Art VLOG: Organic Weedy Prints on the Gelli Plate
- Nov 4, 2023
- 4 min read
I print with all kinds of interesting found objects, and I do have a few favourites, like egg cartons and cardboard packaging, that I like to use to create prints on my gelli plate. But having started on a new painting I found I was looking for some prints with a more organic feel, rather than geometric patterns or structured designs.
So I turned to our veggie patch, which is unashamedly sprouting lots of lovely weeds at the moment, including a kind of marsh grass which turned out to be perfect for printmaking.
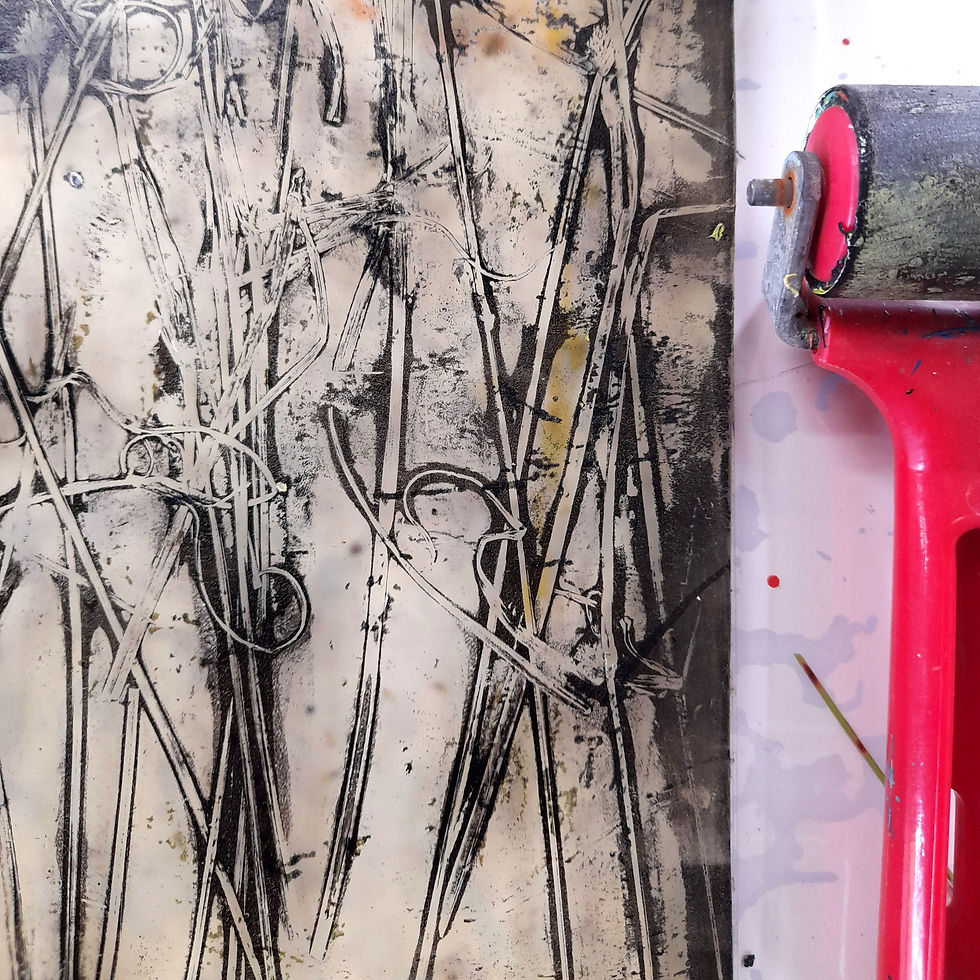
Check out my VLOG video below to see the process of creating two prints from start to finish using just a handful of these weeds, with acrylic paint, on my gelli plate.
For these prints I used Wet Strength Tissue paper, as they'll collage beautifully onto my latest painting.
The colours I chose, will work well with the painting that's underway and I can tint, glaze and alter the colours with layers of paint diluted with airbrush medium or glazing medium, as I need once they are on the artwork.
I'll use just snippets of these prints in different areas of the painting, so I don't need to produce a perfect frame worthy print in one go. Even the off cuts, trimmings and strips used for 'blotting' will be saved for use in something else in the future.
I'll definitely have another go with these weeds in some other colour ways, but at the moment I'm creating prints with a focus on the colours that are in my current work-in-progress.
Here are a couple of tips to help you if you're keen to have a go!
Drying Time
The humidity here in Queensland at the moment means that drying times are a bit longer than I'd usually expect, but if you're having a go, you can check if your print is ready to pull by just running your hand over the back of the paper to see if it feels dry to the touch. If it still feels a bit damp it's probably not quite ready. You can always lift one corner of the paper carefully for a sneaky peek to see if the paint is ready to let go of the plate.
I have left paper stuck to the plate overnight and it pulls the print off beautifully the next day no problem, so don't worry about leaving it too long - it's seems that's never a problem. Trying to pull the print when the paint is not dry enough is more likely to cause you the print to be a bit patchy and not pull away nice and cleanly.
Paints
I used Liquitex Basics tube paints for this printing session, but I have a collection of lots of different brands of paint, which range from ones I've picked up from the $2 store to Officeworks 'Born' paints and Jo Sonja and Atelier acrylics. The tube paints generally are a good viscosity for printing on the gel plate and I'm guided by the colours I like, rather than the brand. Tube paints are handy and less messy than using paint from my big tubs, which are a bit thicker. You can use these though if that's what you have, and if they feel a bit too 'chunky' you can let them down a bit with an open medium to improve their 'roll-ability'.
For these prints I used Unbleached Titanium, Black and Light Olive Green. I made additional prints using Payne's Grey and white on various papers including Tea Bag Paper and Swedish Tracing Paper and I had a piece of grease proof paper covered in white primer, so I had a go with that as well - check out the gallery below.


Papers
For these prints I used mainly Wet Strength Tissue paper as it's great for capturing lots of fine details, but I've also been trying out a couple of new types of paper. Teabag Paper and Swedish Tracing Paper.
There are subtle differences between all three.
Wet Strength Tissue paper is different from regular tissue paper. It handles wet media such as paint and inks really well, without dissolving into a mushy mess! It's the thinnest of the three papers I've been trying and has a slight sheen on one side, which is the side to put face down on the gel plate, over the wet paint. It will take a fair bit of tension as you pull the print without ripping, as you'll see from the video. This structure of the paper will almost completely disappear once is collaged onto an artwork, using Matte Medium as an adhesive. It has a tendency to wrinkle a bit, more so than the other papers, which adds incidental texture to the painting surface.
Teabag Paper is slightly thicker than the Wet Strength Tissue but behaves in a similar way. It's happy with tension, captures nuances and details and once collaged is slightly more opaque that the tissue, but that adds a lovely quality of it's own to mixed media work. It is less prone to wrinkling as it's slightly heavier in weight that the tissue.
Swedish Tracing Paper has a more fibrous structure and feels and behaves more like a textile than a paper - which is what it's really designed for. Pattern makers use it for creating templates and sewing them together. This is the most opaque of the three papers once collaged, and prints on this paper have a beautiful sheen. It seems to take charcoal and pencil less easily once collaged, but all these little variations add interest to a mixed media painting!